
We all know how hard it can be to explain complicated topics. Whether you are a teacher, a student, or a content creator, turning difficult ideas into simple ones is a big challenge. Luckily, video is a powerful tool that can make anything easier to understand. And with CapCut, it’s now easier than ever to create animated videos that explain even the most complex subjects.
You don’t need expensive software or fancy equipment. With just your phone or computer and a little creativity, you can make professional-looking videos. And the best part? You don’t even need to record your own voice. CapCut has a built-in text to speech feature that turns your written words into voiceovers! This is great if you’re camera-shy or don’t have a microphone. Just type your script, choose a voice, and let CapCut do the rest.
Why Animated Videos Help Explain Difficult Ideas
People learn better when they see and hear information together. That’s why animated videos are so effective. If you try to explain something complicated with only text, it can get boring and confusing. But if you show the same thing with movement, colors, and voice, people will pay more attention and remember more.
Let’s say you’re explaining how gravity works. You could talk for five minutes and still lose your audience. But a short video showing an apple falling from a tree, with arrows and labels, and a simple voiceover, makes it much easier to understand. CapCut lets you add these animations and effects with just a few taps.
What You Need to Get Started
Before you create your first video, here’s what you need:
-
CapCut (download it from the App Store or Google Play, or use it on desktop)
-
A clear idea of what you want to explain
-
A short script with simple words
-
Some visuals like drawings, icons, or pictures
Once you open CapCut, tap “New Project” and upload your video clips or images. You can also record your screen if you’re explaining something from a website or app.
If you want to make your work even easier, try using an AI video generator. These tools can help you turn scripts into videos by automatically adding animations, voice, and music. Some of them even work with CapCut, giving you a big head start on your video project.
Writing Your Script in a Simple Way
Before you hit “record” or start editing, write a short script. This script should explain one idea at a time. Don’t try to explain too much in one video. If the topic is big, break it into parts and make a video for each one.
Use simple language. Imagine you’re talking to a 12-year-old who knows nothing about the topic. Try using real-life examples. For example, if you’re explaining data privacy, you can say, “It’s like locking your diary so nobody else can read it.”
Your script can be just 60 to 90 seconds long. That’s enough to explain one topic clearly without losing attention.
Adding Animations and Text in CapCut
After writing your script, you can start designing your video. Add your visuals to the timeline in CapCut. Use fun transitions between scenes. You can add stickers, shapes, and moving arrows to highlight the important points.
CapCut also has cool text effects. Use bold or glowing text to show keywords. Try to keep the screen simple — too many elements can make it confusing. Always match your visuals with the words you’re saying in the voiceover.
Don’t forget to use color! Bright colors can grab attention. Use red to highlight danger, green to show something positive, and blue for information.
Using Text-to-Speech for Voiceover in CapCut
If you don’t want to use your own voice, CapCut has a very helpful text to speech feature. Here’s how to use it:
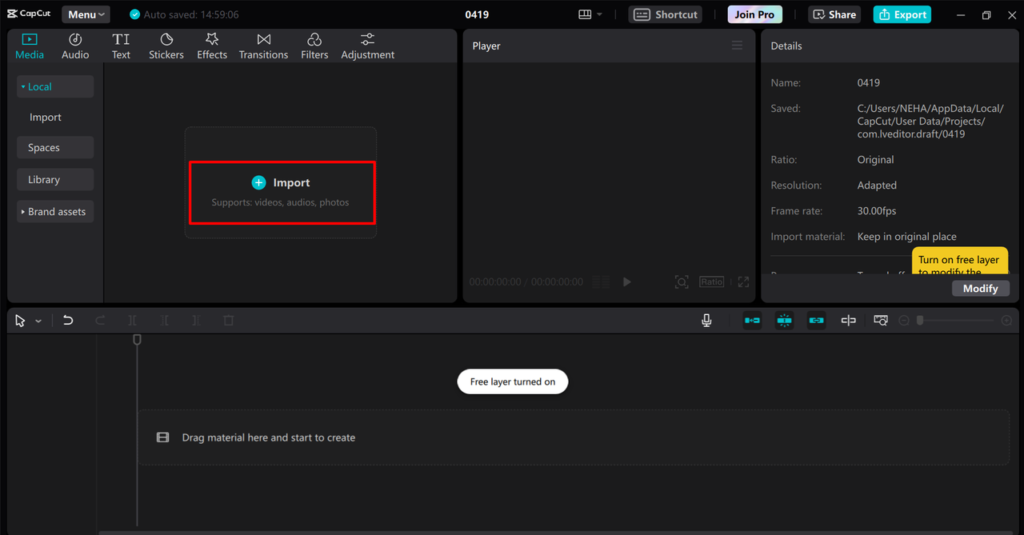
Step 1: Import Your Video
Open CapCut and upload the video you want to work on by clicking on the Import button.
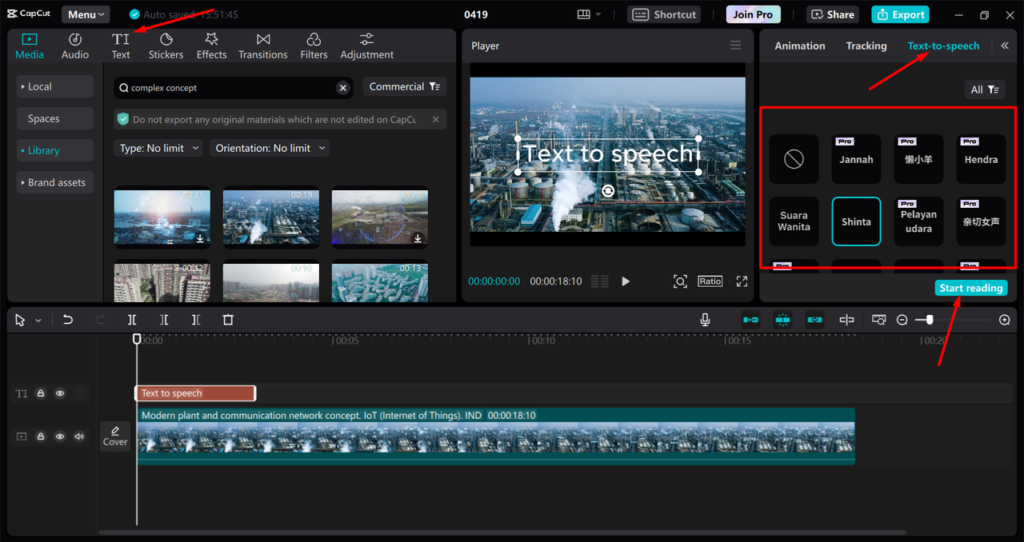
Step 2: Convert Text to Speech
Click on the “Text” option and write the message you want to say — for example: “Take a deep breath and relax your shoulders.”
Select the text box, then click on “Text-to-Speech.” CapCut will give you voice options like male, female, robotic, or calm. Pick the one that matches your video’s tone. You can also change the speed or pitch if needed.
Step 3: Export Your Video
Once your video is complete with the voice, music, and effects, export it. It’s now ready to post on Instagram, TikTok, or YouTube.
With this feature, even shy creators can make videos with strong storytelling. It also saves time because you don’t need to record or edit your voice manually.

Making Your Video Sound Better with Voice Effects
Sometimes, you may want your video to sound more fun or dramatic. In that case, try using a voice changer. Voice changers can make your speech sound like a robot, a child, or even a monster! This can be very helpful for storytelling or entertainment videos.
You can use a voice changer before uploading the audio to CapCut or use CapCut’s own effects. Just tap on the audio track, go to effects, and choose a voice that fits your content. This keeps your viewers engaged and adds some humor or surprise to the video.
Even in serious videos, small voice changes can add emotion. For example, a sad tone for a serious topic or a funny tone for light topics can improve the learning experience.
Polishing and Publishing Your Video
Once your video is ready, it’s time to add the finishing touches. Use animated subtitles so people can understand the video without sound. Subtitles also help people who are hard of hearing or watch videos in noisy places.
Add a title and logo to make your video look professional. If you’re making videos for a brand or business, this is a must. Also, make sure your transitions are smooth and your voice and visuals are in sync.
After everything looks perfect, export your video. CapCut lets you save in different formats, such as MP4 in HD or 4K. Choose the one that suits your platform.
Final Words
Explaining tough ideas doesn’t have to be hard. With CapCut, a simple script, and the right voice, anyone can make animated videos that are easy to understand and fun to watch. Whether you’re teaching, promoting a product, or just sharing knowledge, CapCut gives you everything you need to bring your ideas to life.
Try it today and start creating videos that not only explain — but truly connect.